
I figured Halloween would be an appropriate time to publish a new blog post. Its been eerily quiet here on the old blog. So this post is like a posting from the beyond the...grave!
I did however block out some time for this project. The main reason I've always been pro blogging is it gets the information "out there". I am always so pleasantly surprised at the good DIY renovation pics you can find online. It gives me inspiration, ideas, and hope that we can DIY this kind of project, and that's HUGE!
So without further gabbing, and for those that clicked beyond the facebook post for more details here is our guest bath renovation, before and after!
On September 12th I text messaged Mr. B at work saying "I think I want to renovate the guest bath" and soon after that text, our 3 year old and I took out the glass shower doors and track, while he was still at work.
It took us just under 6 weeks start to finish, of after work and weekend time to get it all done. A few hiccups as usual, but I'm really happy with the results! We (when I say we I mean Mr. B mostly) did 95% of the work, building, installing, and creating. We hired out a drywall texture guy to spray match the existing texture, and had to hire a bathtub chip repair guy when demo got a bit out of hand, and dinged up the cast iron tub. But other than that it was all us!
Before
Of course I was so excited to start ripping the bathroom apart I forgot to take nice "before" shots, so I apologize for my afterthought messy pics.
1975 original vanity and cabinets.
Tile counter top, in a non offensive white. But you know I like to spice things up more than just white tile.


The frosted sliding glass doors had to go, I know they are practical while showering and I prefer them to a curtain for use, but not aesthetically. Someday we might have some frameless clear glass doors installed, but it wasn't in the budget this go around. So the doors were the first to go. Plus look how many towels I had hanging around on that frame, what a mess!!

The second thing to go was the lowered soffits above the bathtub, and vanity. For some reason the builders of our home in 1975 , thought it would be a good idea to lower sections of the ceiling, to give our house that cavernous small feeling everyone loves. So Mr. B lifted those sections right up to where they belong. Just as we did when we renovated our master bath.

You can see the studs here showing the area that the ceilings were lowered to, about 12" down.
Here the drywall was replaced above the vanity after the 12" soffit was lifted, waiting for the can lights to be cut back in and re textured.

Then there was a ton of tile demo.

Mr. B made new doors for the vanity, and a template for the concrete counters. We kept the vanity box, except for the super tall cabinet on the top right, we deleted that one. We filled all the imperfections on the vanity box, sanded, primed and repainted it white. I used a foam roller to simulate a sprayed application and I was pleasantly surprised.

Here are the concrete counters drying out of their molds in the garage. Mr B had made concrete counters in our kitchen, and they were such a nice, affordable, modern, sustainable choice. I really wanted them again.

The beginnings of the tile going up! Super exciting, and a lot more work than all that square 4x4 tile we've laid in the past.

The list of the changes included:
New cabinet doors, drawers, and drawer boxes built by Mr. B
All new faucets and fixtures, and hardware
New sink
Replace shower door with curtain
Lift ceilings
New lighting
New tile
New mirror, with a frame
Shelving above toilet
Replaced all the shower walls
Re dry walled some walls, and textured
Painted the whole bathroom, and vanity box
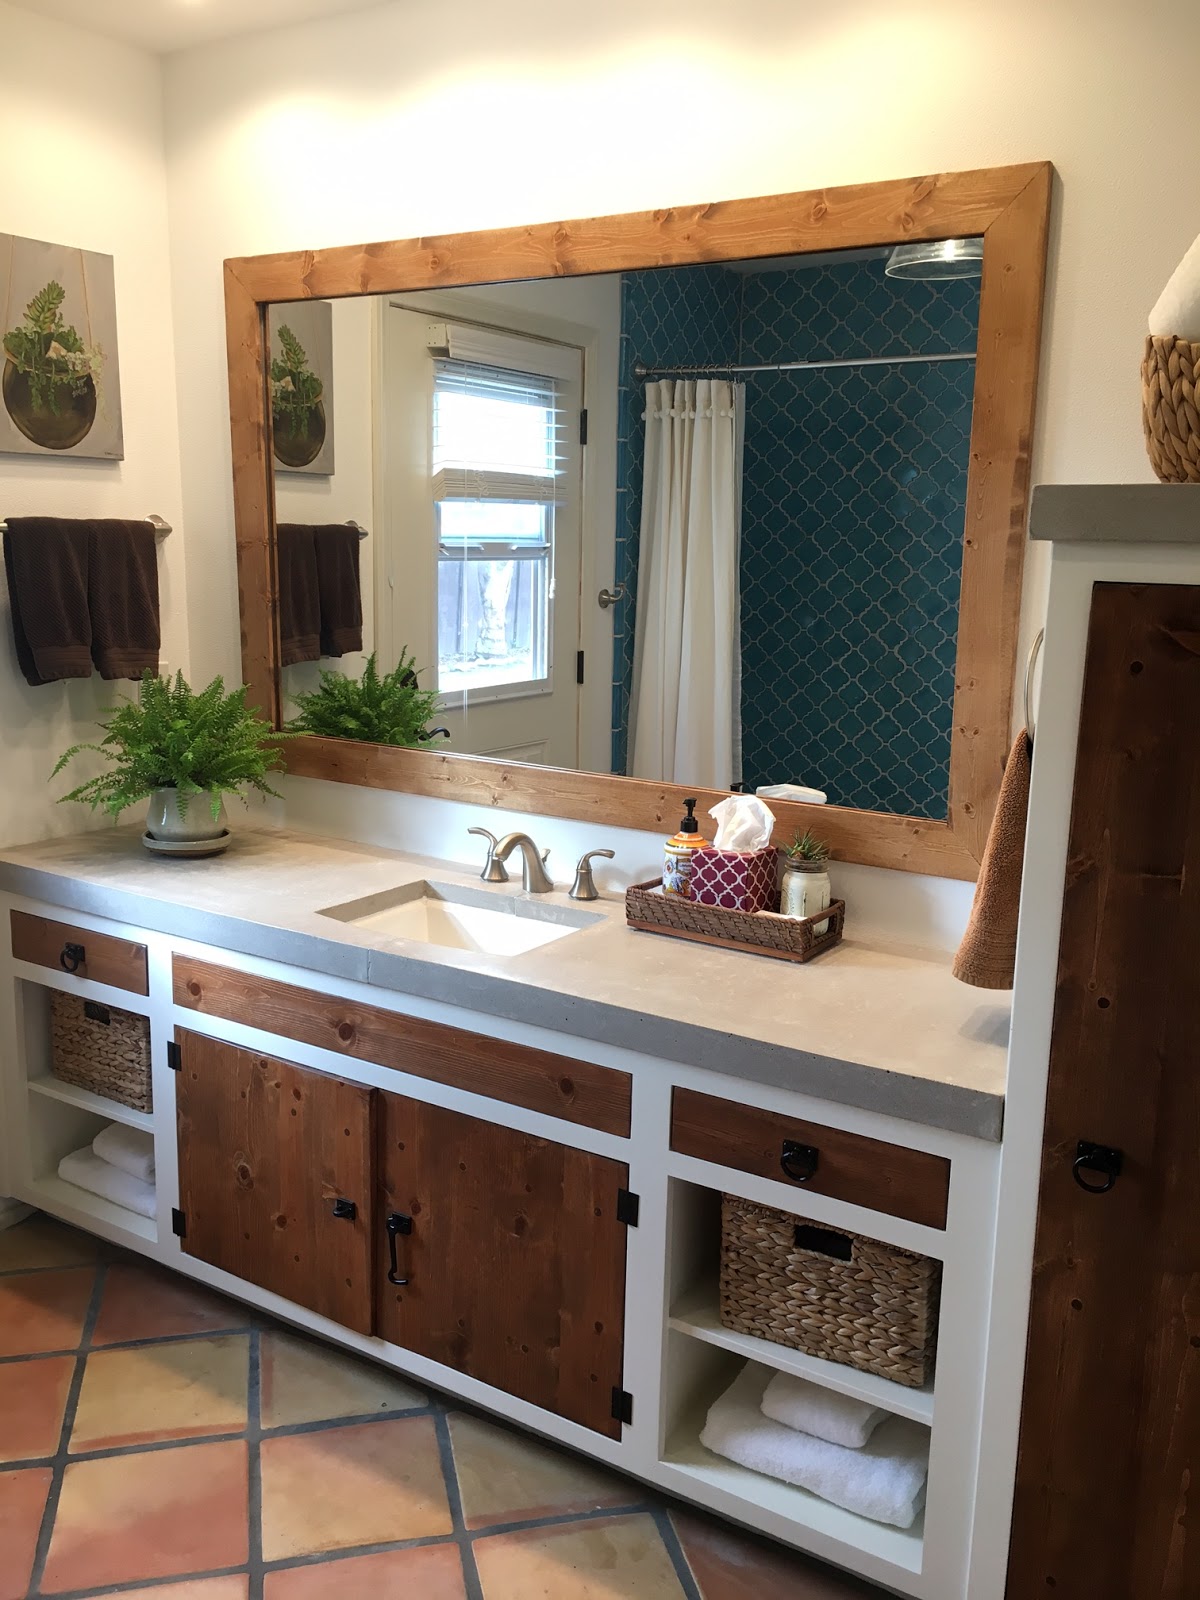
So after that long list of things, we got this as our final result.
After!


I just realized the under sink cabinet isn't shut or latched, but I'm posting it anyway! ha, that's reason #108 of why I'm not a professional blogger. They do close flush, in case you were wondering :P
You can see in the pic below, where the basket is, there used to be an upper cabinet, we that took out to open the room up even more, and added another concrete counter up there.


Thanks for reading!
Mrs. B


